Daytime running
lights are a feature that some claim helps to increase the visibility
of a car to other motorists. Whether or not this is true is a matter
of some heated debate. This web presentation does not attempt to
resolve this debate. What this presentation does do, however, is
give instructions on how to install a daytime running light system
on your non-factory-DRL-equipped S2000. Perhaps you are a US resident
and want a DRL system on your S2000. Or perhaps you've imported
a non-factory-DRL-equipped S2000 into a jurisdiction that requires
them.
One difference
between the install presented here and the simplest of aftermarket
DRL-installs is the manner of operation.
Simple DRL Installs
The simplest
installs simply turn on all of your lights - low beams, park lights,
and dash lights, anytime your engine is running. I personally find
this distasteful, for a number of reasons: all of your interior
dash illumination is always in 'night mode', which makes it hard
to read in bright sunlight; on the S2000, I don't like the idea
of running the HID low-beams all the time. And I also prefer not
to run all of the parking and running lights on during the day either.
|
The installation
can actually be done without cutting a single factory-wire or wire-harness!
Total cost of parts will be at most $75.
Step 1: Parts
-
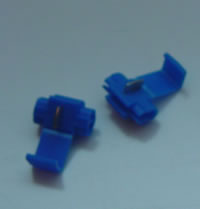
"splicing" connectors |
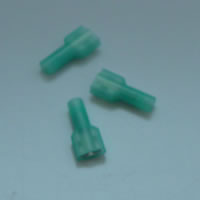
crimpable female tab connectors |
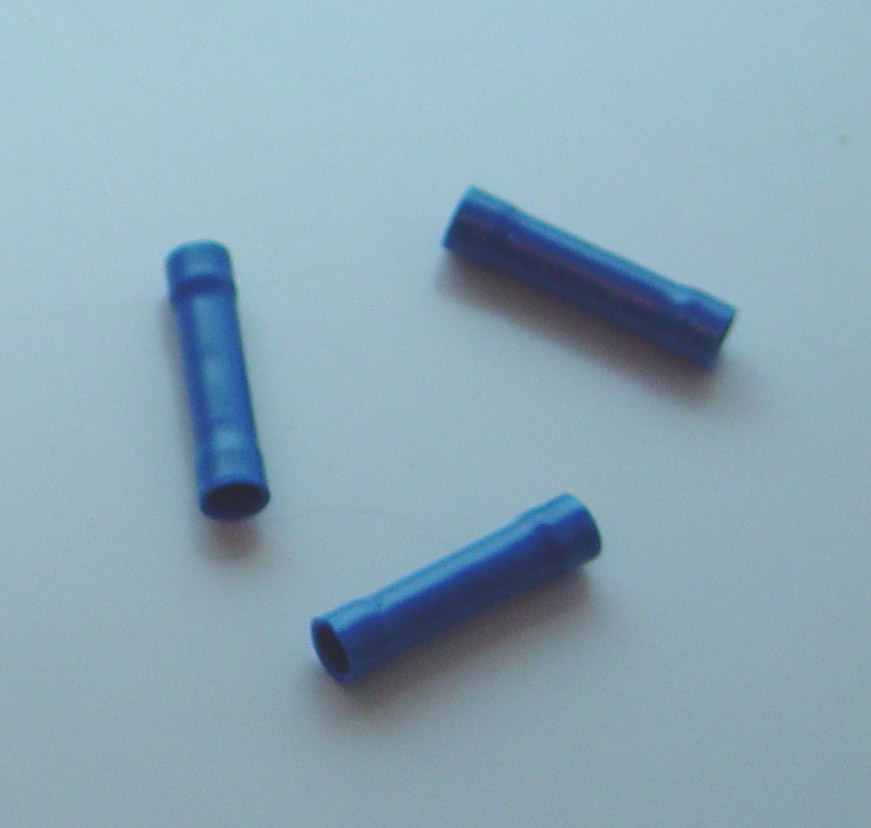
"butt-end" plug connectors |
A
Hamsar 45060 DRL Module (This device is what has the circuitry
for running the high-beams at 60% reduced-intensity, plus a bit
of other functionality). (See the left module in picture 2
below).
- A standard
12V/30Amp Heavy-duty Automotive Relay. (right module in
picture 2 below). In my case, I used a Directed Electronics
610T 30A automotive relay, but you could use any relay that
implements the logic you see in my schematic below, so long
as the current rating is good enough.
- An in-line
fuse holder with fuse (picture 3 below).
- some "butt-end
plug" crimpable connectors for joining wires (or you can
join them some other way if you
wish)
- some "splicing"
connectors
- some crimpable
ring connectors for attaching to power and ground sources (see
picture 3 below).
- crimpable
female tab connectors for attaching wires to the automotive relay.
The DRL module comes with a plug and wiring harness, so you don't
need connectors for that.
- a crimpable
tab connector for attaching a connection to a switched Ignition
source.
- some 16-Gauge
stranded wire in various colors (makes things easier when you
can use different colors). A total of 20 feet of wire should be
more than sufficient.
- some old
Honda headlamp connectors off of a junker (picture 1 below).
Ask your favorite Honda mechanic or go to a junkyard. Splice your
DRL-install wiring into these connectors; this allows you to disconnect
the factory connectors and leave them unmolested. If you don't
have these then you'll either have to cut up the factor high-beam
connectors or you'' have to find some connectors of your own to
fit onto the tabs on the high-beams themselves.
- A crimper
tool, wire stripper, and wire cutter (see picture 4 below).
- A 12mm bolt
to mount the DRL module and Relay in place
- Some electrical
tape
|
1. old high beam connectors
3. In-line fuse for high-beams
Step 2: Understand the required changes
The circuit
diagram below shows the bits of circuitry essential to this conversion.
On the left is the part of the headlight circuit that is being modified.
On the right is a schematic of the new DRL-high beam circuits. Essentially,
the high beams are being completely removed from where they were
wired before, and then wired in under the control of the DRL module
and the Relay. (A higher resolution version of this diagram is available
at the bottom of this page):
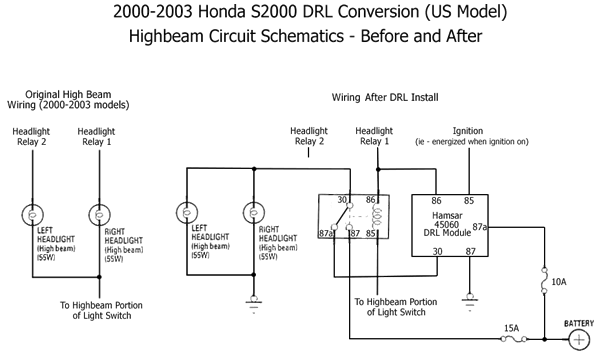
The new DRL circuit works
as follows:
- when the
Ignition is activated (ie- key is turned to the 'ON' position),
pin 85 on the DRL module is energized. This causes pin 30 on the
DRL module to output 60% reduced-intensity power. Assuming the
main headlight switch is not in the Low-beam or high beam position,
this reduced-intensity power is connected through the relay to
the headlamps, and you have reduced intensity high-beam DRLs.
- when the
main headlight switch is in the low-beam position, the headlight
relays are activated, and the low beams and all other lights come
on as normal; however, this now also energizes pin 86 on the DRL
module, causing it to turn off the 60% reduced-intensity power
to the high beams. So, the DRLs switch off when the low beams
turn on.
- when the
main headlight switch is in the high-beam or flash-to-pass position,
current flows through pins 85-86 of the relay, causing the relay
to activate and causing a connection between pins 30 and 87 on
the relay, connecting the highbeams to full 12V power (and causing
them to come on at full intensity).
Step 3: Installation
NOTE:
Picture 14 (at the bottom) is a schematic of the headlamp circuitry
with the modifications required overlaid in orange. I've also
labelled the wire colors I used in my particular installation.
Referring to this diagram often should greatly increase in the
understanding of what connects to what.
0) Disconnect
your battery.
1) I made all of the connections between the DRL module and the
relay before installing into the car. I then wrapped the two modules
together tightly with electrical tape.
2) Connect
the wire going to pin 87 on the DRL module to chassis ground (I
used the ground position near the passenger headlamp area).
3) Connect
the wire going to pin 87a on the DRL module to power (the '+' battery
connector). In case its not obvious, connect at the end of the wire,
_after_ the supplied 10A inline fuse.
4) Connect
the wire going to pin 30 on the DRL module to pin 87a on the relay.
7. yet another view of the mount area
5) Connect pin 87 of the relay to an inline 15A fuse, and then
connect from that fuse to power (the '+' battery connector),
6) disconnect
both left and right factory highbeam connectors from the high beams.
(see picture 8).
(I am going
to assume you have the old honda headlamp connectors at this point)
7) on the driver's
side, wrap the factory highbeam connector in something weatherproof.
It won't be used anymore.
The scrounged
headlamp connectors you have may have 3 terminals. you are only
interested in the left and right connectors. The top one will be
unused.
8) for the
driver's side highbeam, connect the highbeam headlamp wire that
used to connect to the RED/BLU wire on the factory high-beam connector
to ground. (I used the ground position near the driver's side
headlamp area).
9) for the
passenger's side highbeam, connect the highbeam headlamp wire that
used to connect to the RED/BLU wire on the factory high-beam connector
to ground. (I used the ground position near the passenger's
side headlamp area).
10) connect
a wire to the [driver's side] highbeam headlamp wire that used
to connect to the RED/YEL wire on the factory high-beam connector.
Run this wire all the way across to the passenger side of the
car and to the [passenger's side] highbeam headlamp wire that
used to connect to the RED/WHT wire on the factory high-beam connector.
11) Splice
into the wire from 10) and a wire from that splice to pin 30 on
the Relay. This wire will be carrying the the full-intensity high-beam
current or the DRL half-intensity current, depending on the current
mode.
12) crimp a
tab-style connector onto the end of a new wire and slot it into
the hole on the passenger-side factory high-beam headlamp [female]
connector that connects to a RED/BLU wire. Note: This is the connector
that was originally attached to the passenger-side high-beam. Connect
the other end of this wire to pin 85 on the relay module.
13) crimp a
tab-style connector onto the end of a new wire and slot it into
the hole on the passenger-side factory high-beam headlamp [female]
connector that connects to a RED/WHT wire. Note: This is the connector
that was originally attached to the passenger-side high-beam. Connect
the other end of this wire to pin 86 on the relay module. Also,
splice into this new wire and connect to pin 86 on the DRL module.
14) Run a wire
from the fuse box area under the dash, though a rubber gasket on
the firewall (you'll need something to poke a small hole through
it), into the engine compartment and over to the DRL module. Connect
the wire to pin 85 of the DRL module (see picture 9).
15) Connect
the ingition wire you ran under the dash to the BLK/YEL wire in
the large connector right connector next to the fusebox. I used
a tab-style connector and wedged it in with that wire at the connector
(see picture 10).
16) bolt down
the DRL module/Relay to the indicated mount point (see picture
7).
That should
be it. Re-check all of your connections, make sure everything is
ok. Picture 11 shows the completed installation (although
a lot of the wires and connectors are not visible in the shot).
9. Punching through the firewall
10. Connecting IGN source
12. Closeup, DRL module and Relay
13. Closeup, DRL Module and Relay
16. Installed DRL and Relay
Step 4: Testing
Test the setup as follows:
1) re-connect your + battery connector to your battery.
2) verify normal operation of high beams, low beams, etc with the car off.
3) insert key into ignition and turn to the 'ON' position. If all is well, the high-beams (and only the high-beams) should come on at low intensity, AFTER ABOUT 5 SECONDS! (built in delay in DRL module to allow you to start the car without the DRLs on).
4) if you now turn on the low beams, the DRLs should go off.
5) high-beams should come on at full-intensity when selecting the high-beams or flash-to-pass on the headlight switch.
If all this works... Congratulations!
The picture below shows the DRLs in action.
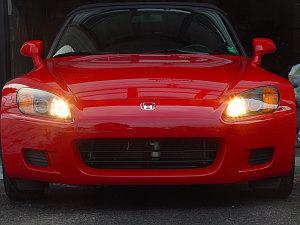
low-intensity DRLs in action
The two schematics below outline the wiring changes that are involved in this installation. The first schematic shows a before and after overview comparison of the electrical circuits involved. The second schematic shows the full original schematic of the S2000's headlight wiring, with the modifications we've made overlaid on top in orange. I recommend you use the second schematic as a helpful guide as you make these modifications.
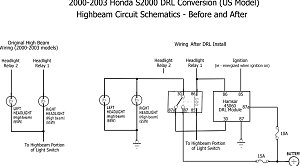
Basic Schematic
Note: click on the schematics to see larger, more readable versions of them. If your screen resolution is not very high, you may still find that even the larger versions are not that readable. In that case, do the following: (1) click on the schematic to cause it to pop up into a separate display; (2) click the 'Bigger Image' button at the top; (3) right-click on the schematic and select 'save picture/image as...' and then save the image to a location on your computer. You can then open that image separately, and you'll find that it is of much higher detail (make sure that whatever image viewer you use does not automatically resize down the image or it still won't look detailed.)
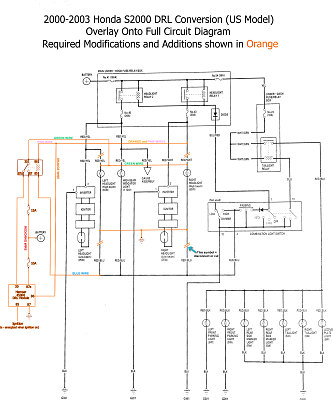
Schematic overlay
I'd like to thank my friend Markus for helping me out with this little project. I may have been able to get it done without him, but not without a lot of extra time and a bit of doubt.